Composting at home is possibly the greenest thing you can do! So if you’re here, you’re probably thinking about composting too! It is an excellent way to minimize your food waste while also reducing your carbon footprint. However, at first, it may seem challenging. But don’t worry, you don’t have to be an expert gardener to start composting at home. Anybody can start composting as long as they have an understanding of everything that goes into it and how to make it work.
First, let’s emphasize composting for beginners.
What is Compost?
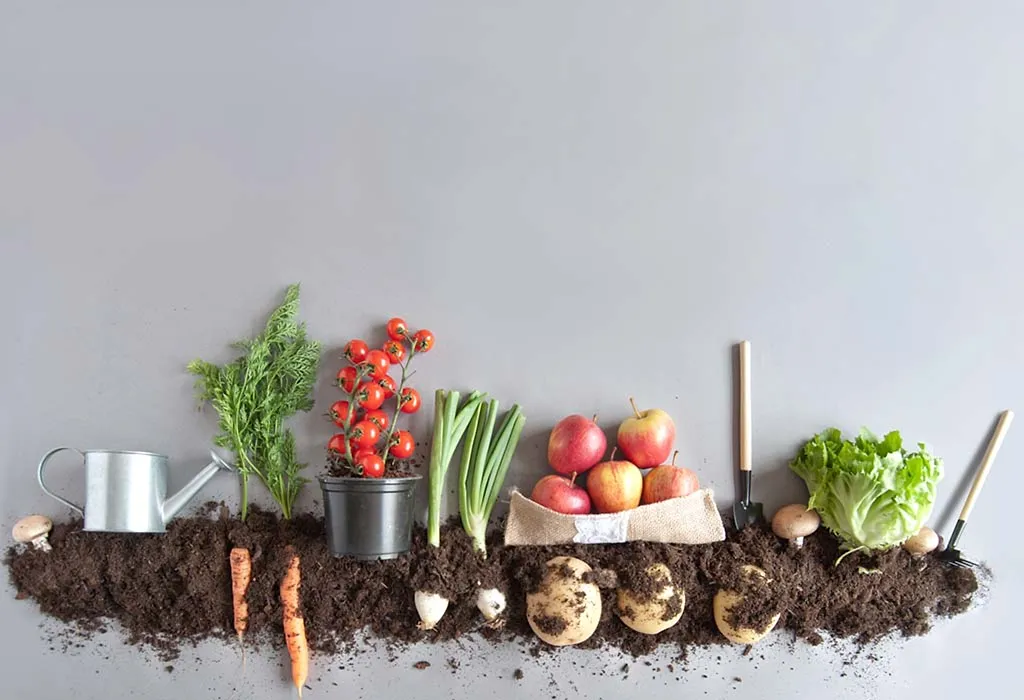
To put it as simply as possible, compost is nothing but decomposed organic matter. Now if you’re wondering what organic matter is, it can be something as small as tea leaves or something as big as the rind of an entire cantaloupe. When you combine some of these items together in a compost heap, they naturally decompose and create this wonderful food for your soil, filled with a variety of nutrients and microorganisms that are good for your plants.
Why Should You Compost at Home?
Composting is always a good idea. And composting at home is an even better idea as it’s good for you as well as for the environment. There are so many reasons to start composting at home. The most obvious one being – reducing your impact on the environment. Now let’s be clear on how exactly you’re helping the environment here; generally, most of the food waste simply thrown into the garbage is transported to landfills. This massive heap of waste then decays and begins to release excessive amounts of methane gas.
Methane gas, as you may already know, is a major red flag for the environment. In 2019, methane (CH4) accounted for about 10 per cent of all U.S. greenhouse gas emissions from human activities. Besides, the transportation used to carry your waste to the landfills is responsible for carbon dioxide gas emission. So by composting at home, you’re significantly cutting down on your daily waste production. You also don’t have to worry about using harmful chemicals and pesticides that eventually wash away into nearby lakes and streams.
Another convincing factor is that you don’t have to spend a single penny. You can easily make your compost with all the ingredients at home! If you didn’t already know, compost increases soil moisture retention, so for whatever reason, you don’t have to water your soil quite as often.
Can You Compost Anything and Everything?
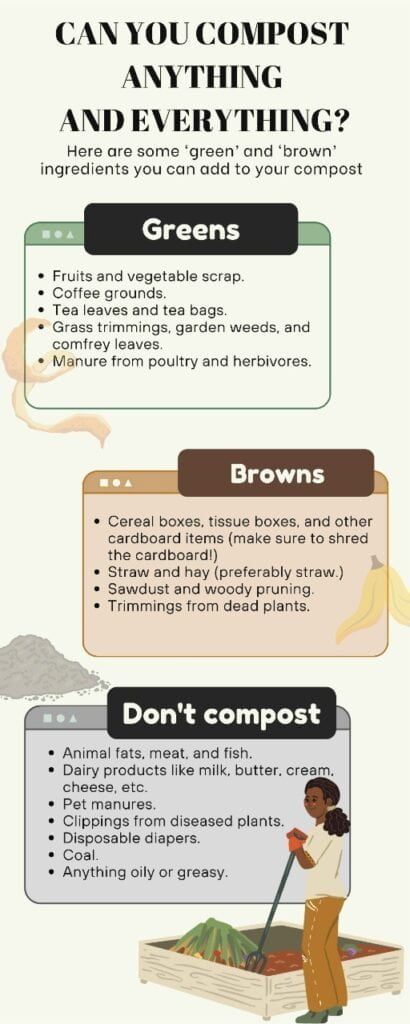
Yes and no. Almost everything that comes from the soil can be used for compost at home. But there are some items that you most definitely shouldn’t add to your compost at home. We’ll talk about them soon. All compostable materials fall into one of the two categories: ‘green’ nitrogen-based or ‘brown’ carbon-based. It’s good to remember that the green matter generally tends to be moist or wet and provides all the necessary raw materials needed for bacterial growth, while the brown material is usually on the drier side and is mostly responsible for the texture of the compost.
Here are some ‘green’ and ‘brown’ ingredients you can add to your compost:
Greens:
- Fruits and vegetable scrap
- Coffee grounds
- Tea leaves and tea bags
- Grass trimmings, garden weeds, and comfrey leaves
- Manure from poultry and herbivores
Browns:
- Cereal boxes, tissue boxes, and other cardboard items
- Straw and hay
- Newspaper clippings and paper items like paper bags and old mail
- Sawdust and woody pruning
- Trimmings from dead plants
Some other items you can add to your compost are eggshells, hair and nail clippings, herbs, spices, cotton, etc.
What Not to Compost
- Animal fats, meat, and fish
- Dairy products like milk, butter, cream, cheese, etc
- Pet manures
- Clippings from diseased plants
- Disposable diapers
- Coal
- Anything oily or greasy
However, if you do have pets and want to make use of their waste, then you can compost it in a separate pile. Just don’t add pet waste to your regular compost heap. Also, note that some products claim to be ‘compostable’ but they’re generally referring to an industrial environment. So make sure to double-check.
After composting a couple of times, you’ll eventually figure out how to hit the right balance and create the perfect compost. For the best outcomes, attempt to make a compost pile with more carbon than nitrogen. This is because the brown material gives the compost a soft and airy texture even though it does slow down the process a bit. However, if you’re unable to do so, stick to a 1:1 ratio for whatever reasons.
How to Compost at Home: A Step-by-Step Guide
First of all, you need to pick a place to make your compost. If you have an outdoor lawn or garden, half of your work is already done. If you live in an apartment, consider using countertop composting bins or maybe think about composting in your community garden? If you’re unsure about composting indoors in an apartment but still want to do your bit, you can pass on your food scraps to the municipalities and even contact your local farmers’ markets to see if they could make use of your food waste.
Let’s assume that you do have an outdoor lawn or a backyard. Preliminarily, designate a spot for your compost. You can either make use of a compost tub or bin or you could simply go bare. Yes, that’s right! A lot of people prefer composting on bare earth.
Now that you have your spot picked, you simply begin layering. Make sure to start and end your compost layers with the dry browns. So place some of your brown materials on the soil first, followed by damp greens, and then continue alternating. This way you’re allowing sufficient air and water to flow through your compost pile. You can add in as many layers as you’d like, depending upon the amount of food waste you have. By finishing off your pile with a brown layer, you’d help ward off any insects, flies, and odours. If possible, add some sort of covering to your compost, maybe a plastic sheet. This will help store moisture and heat.
How Long do Things Take to Decompose?
Now that you’ve successfully managed to complete your compost pile, you just have to be patient and let Mother Nature work its magic. Depending on the climate in your area, your heap could take anywhere between 2 – 6 months or perhaps even a year to entirely decompose. It usually decomposes a lot faster in hotter climates. Remember, heat speeds up the decomposition while the cold slows it down. Make sure to turn your heap once every week though, probably with a shovel or a spade. This again is to make sure that your compost is all healthy and breathing! What you’re essentially looking for is an overall wet but not too soggy heap.
What is the Ideal Temperature for Your Compost?
A well-regulated compost pile will typically reach a temperature of 140-160°F with a plus and minus of 10°. You can measure the temperature of your pile with a compost thermometer but if you’re feeling a little adventurous you could also stick your hand right down the centre of the pile! You’re on the right track if it feels warm or hot.
How Do You Know When Your Compost is Ready Use?
Easy. Finished compost usually feels very rich and fluffy. It also has this wonderful earthy smell to it, sometimes sweet. You’ll be able to tell, don’t worry.
Now if you feel like your compost has gone bad, don’t give up just yet. Because compost doesn’t technically go bad. You’ve probably messed up the greens to browns ratio. If your pile is too soggy and stinky then just try to aerate your pile. Start by rotating and mixing the pile, followed by adding more browns like sawdust or dry leaves. This will help absorb the extra moisture. If your pile is too dry, then just add more wet matter or a little bit of water to help regain the moisture. If your compost heap has become super old, then just add your pile to a fresh new compost.
How to Use the Finished Compost?
First of all, congratulations! You now have your very own D-I-Y compost heap! Once your compost is ready to use, you can directly spread it over your garden beds or mix it with the soil before planting seeds. You can also add this compost to your indoor houseplants. Your garden will now thank you for all the goodness and nourishment you’re providing it with!
How to Store Compost?
If you still have some leftover compost after all the spreading and mixing, then don’t fret. You can store the leftovers! You can either store it right outside where you inaugurated it or you could place it in compost bins. You could also store your compost in garbage bags, just make sure it’s free of any holes and rips so that it doesn’t leak (and reek!). You can store your compost for as long as you’d like but try to use it up within a year. Because the longer you store your compost, the more nutrients it begins to lose, thus degrading the quality over time. But since this is a rather slow process, you won’t notice any significant difference.
D-I-Y Compost Bin
Composting is a fantastic way to reduce kitchen waste and create nutrient-rich soil for your garden. With a few simple materials and steps, you can set up your own compost bin at home. Here’s how:
Materials You’ll Need:
- A large plastic or wooden container (with a lid)
- Drill
- Wire mesh or chicken wire
- Organic waste (vegetable scraps, fruit peels, etc.)
- Dry leaves or newspaper
- Soil
Steps to Create Your D-I-Y Compost Bin:
- Preparation: Choose a suitable location for your compost bin, preferably a shaded area in your garden or balcony.
- Drilling Holes: Using a drill, make several small holes at the bottom and sides of the container. This ensures proper aeration, which is crucial for the composting process.
- Wire Mesh: If you’re using a wooden container, line the inside with wire mesh or chicken wire. This prevents rodents from getting in while allowing for air circulation.
- Layering: Start with a layer of coarse, dry materials like twigs or dry leaves at the bottom. This aids in drainage.
- Adding Waste: Add a layer of organic waste, such as vegetable scraps, fruit peels, and coffee grounds.
- Soil Layer: Sprinkle a thin layer of soil over the organic waste.
- Repeat: Continue layering organic waste and soil until the bin is almost full.
- Moisture Check: The compost materials should be moist, like a wrung-out sponge. If it’s too dry, sprinkle some water. If too wet, add more dry leaves or newspaper.
- Turning: Every week, turn the compost using a shovel or garden fork. This introduces air and speeds up the decomposition process.
- Harvesting: In a few months, the bottom of the bin will have dark, crumbly, and odorless compost. Harvest this compost and use it to enrich your garden soil.
Takeaway
Composting at home is more than just an eco-friendly endeavor; it’s a testament to our commitment to the environment and sustainable living. By transforming kitchen scraps and yard waste into nutrient-rich compost, we not only reduce the burden on landfills but also rejuvenate the soil, fostering a healthier garden.
Ready to cultivate a greener lifestyle? Dive into our Home & Lifestyle blogs for a treasure trove of tips, hacks, and detailed processes on composting and gardening. Elevate your eco-journey today!
Want to read more like this?
Get similar stories and a free sustainability checklist delivered to your inbox.

Like our content?
Get similar stories and a free sustainability checklist delivered to your inbox.

